

Step 1 — Enable the Email method
Open your profile under Integrate → Browser Profiles, and under Two-factor authentication select Email. Champ reads codes from the profile’s Champ email address, generating one if the profile doesn’t have one yet. Copy the address before your first login test, so the site has somewhere to send the code.Step 2 — Get codes to the Champ address
Pick whichever fits the site:- Create the account with the Champ address — if you’re setting up a fresh account for Champ to use, sign up with the Champ address as the account’s email. 2FA codes (and any verification emails) then land at the address directly — nothing to forward or register.
- Register it directly — if the site lets you set the email that receives 2FA codes, paste the Champ address there.
- Forward from your inbox — if codes go to a mailbox you control, forward them to the Champ address.
Forward from Gmail
Following Google’s auto-forwarding guide:-
In Gmail on the web, open Settings (⚙️) → See all settings → Forwarding and POP/IMAP, and click Add a forwarding
address.
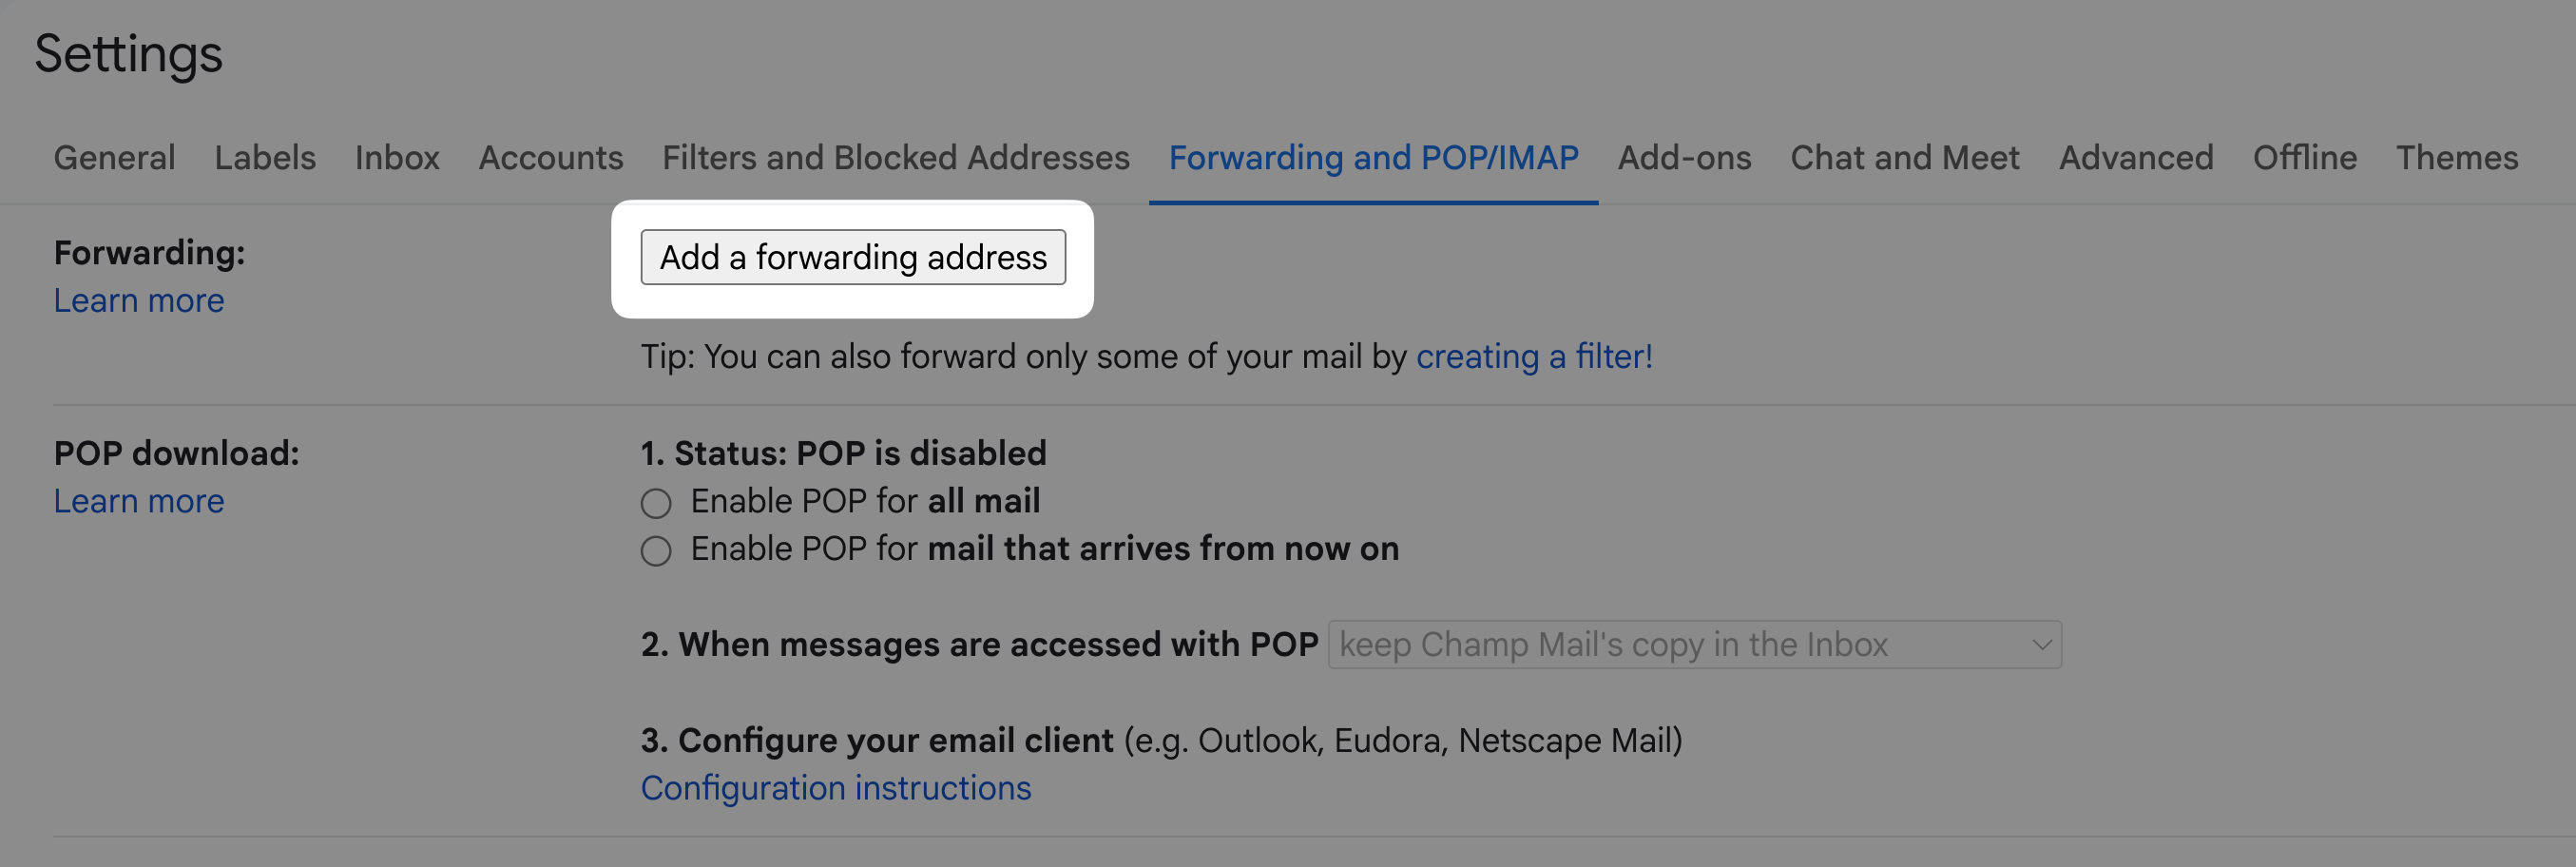
Gmail's Forwarding and POP/IMAP settings. Click Add a forwarding address.
- Paste your Champ address and confirm. Google emails a confirmation to that address. Champ relays it back to your own inbox as an “Action required” message — open it and click Google’s confirmation link to authorize forwarding.
-
Now scope a filter so only your 2FA mail is forwarded. Open Settings → Filters and Blocked Addresses and click
Create a new filter.
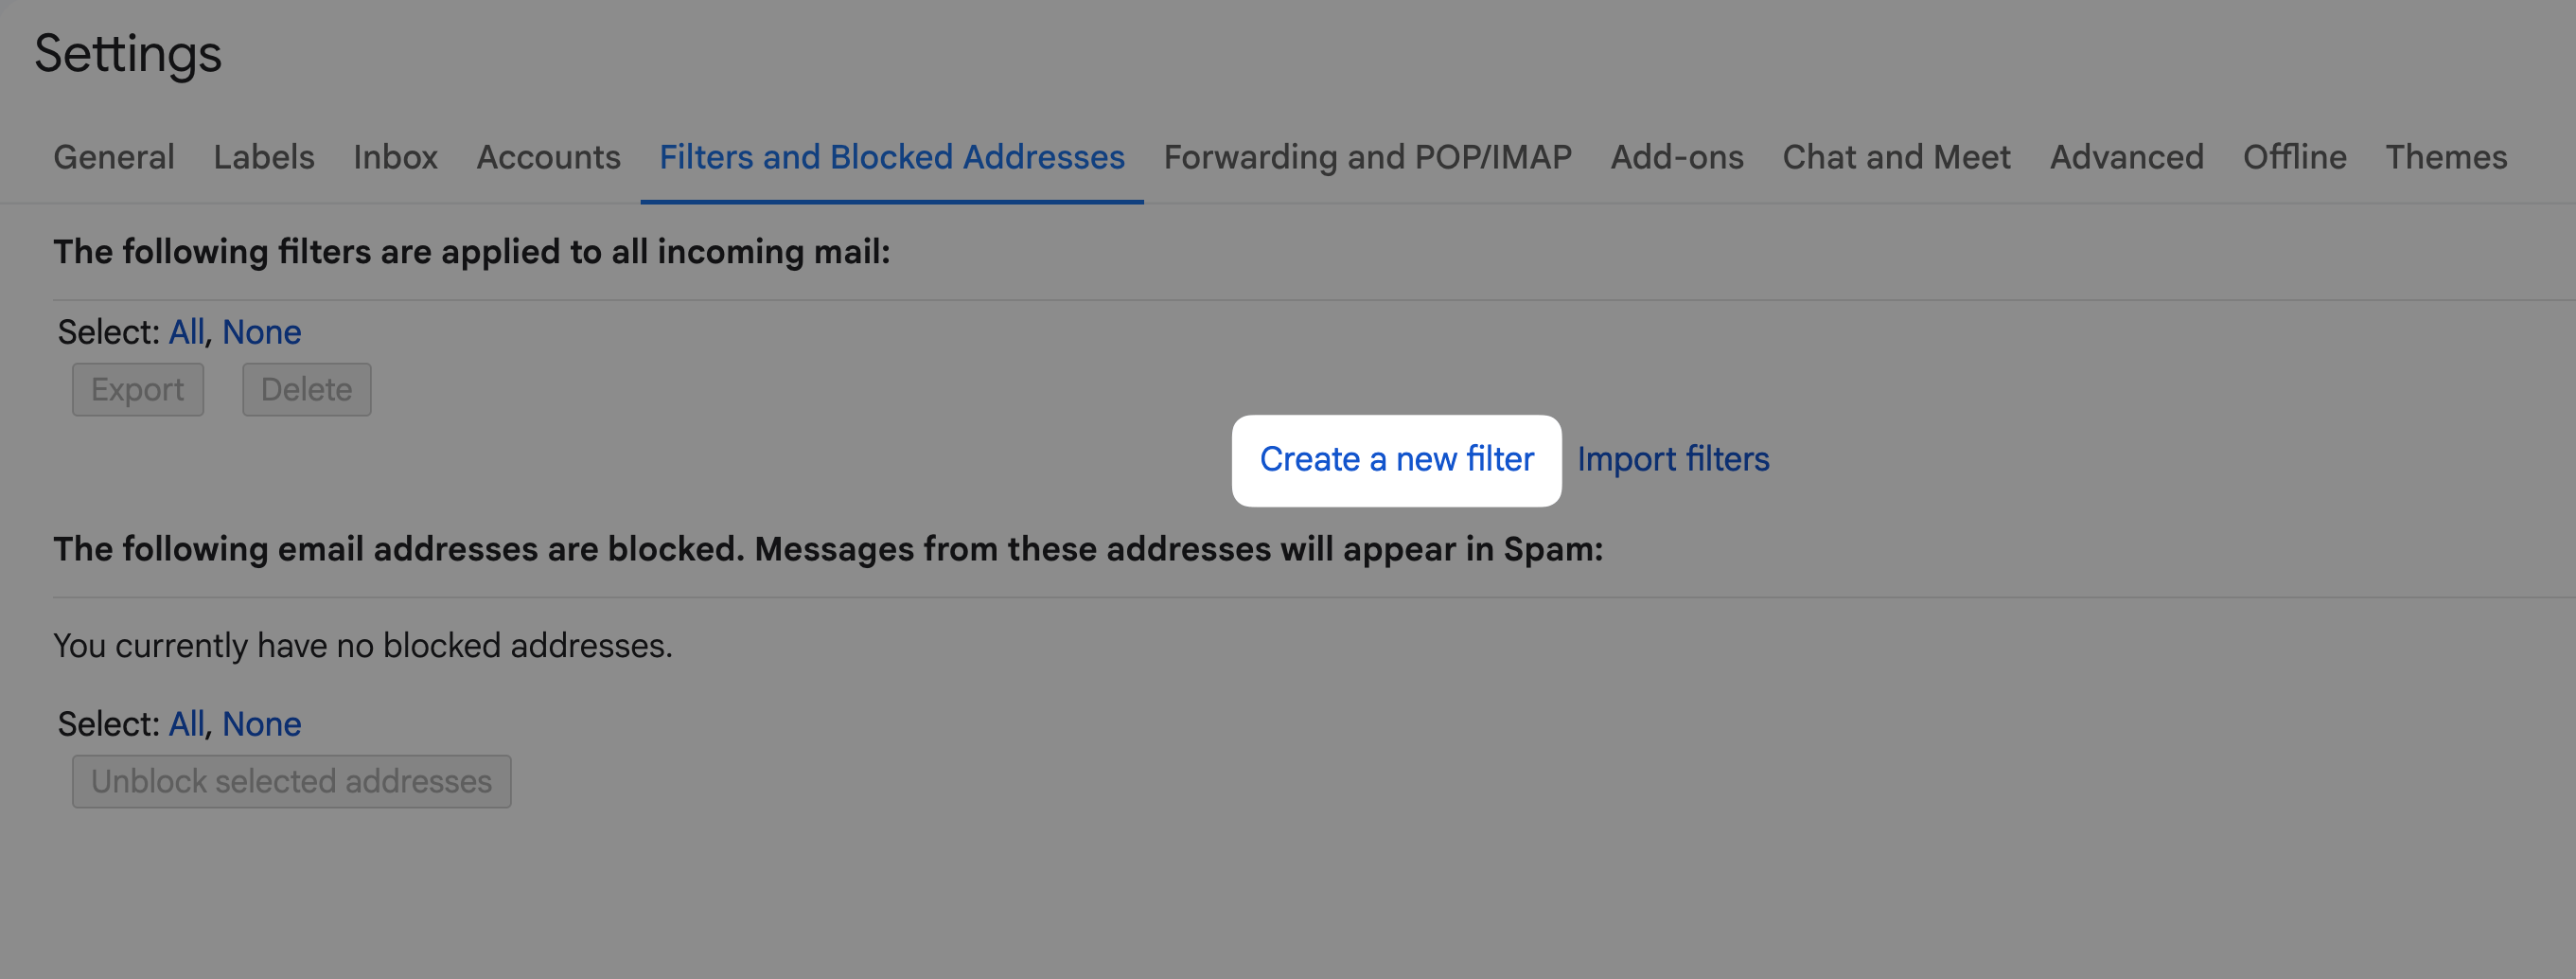
The Filters and Blocked Addresses tab. Click Create a new filter.
-
Match on your 2FA sender (From) or Subject, then click Create filter. Scoping the filter keeps unrelated
mail out and makes code detection more reliable.
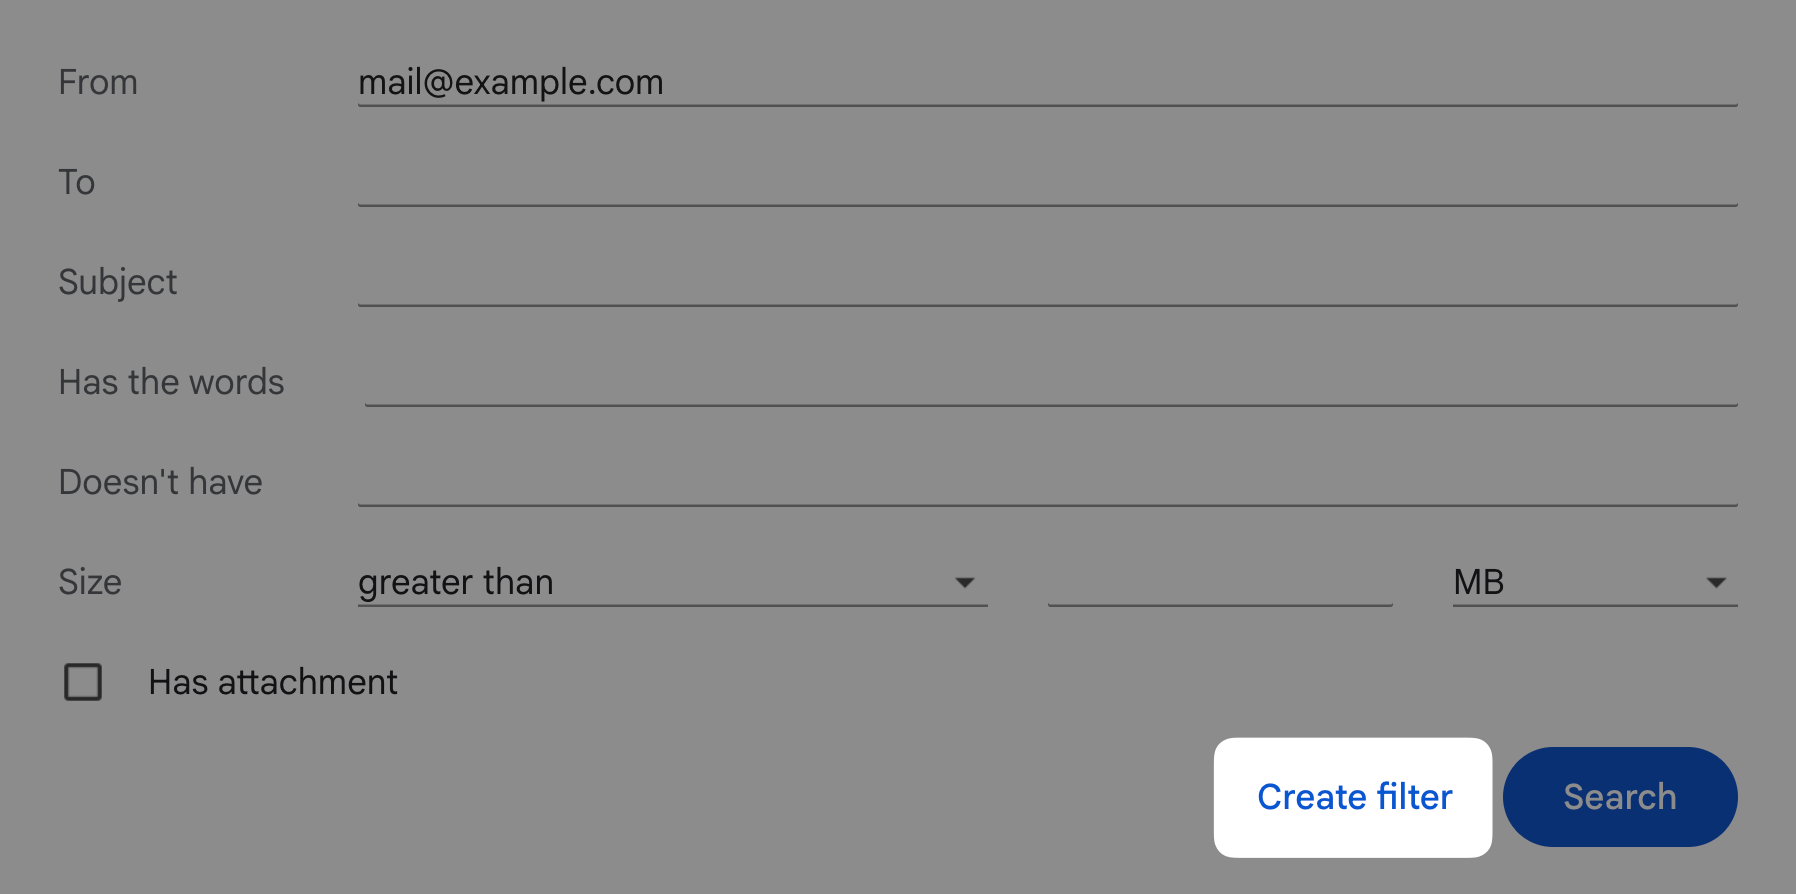
Match your 2FA sender or subject, then click Create filter.
-
Check Forward it to and pick your Champ address, then click Create filter to save.
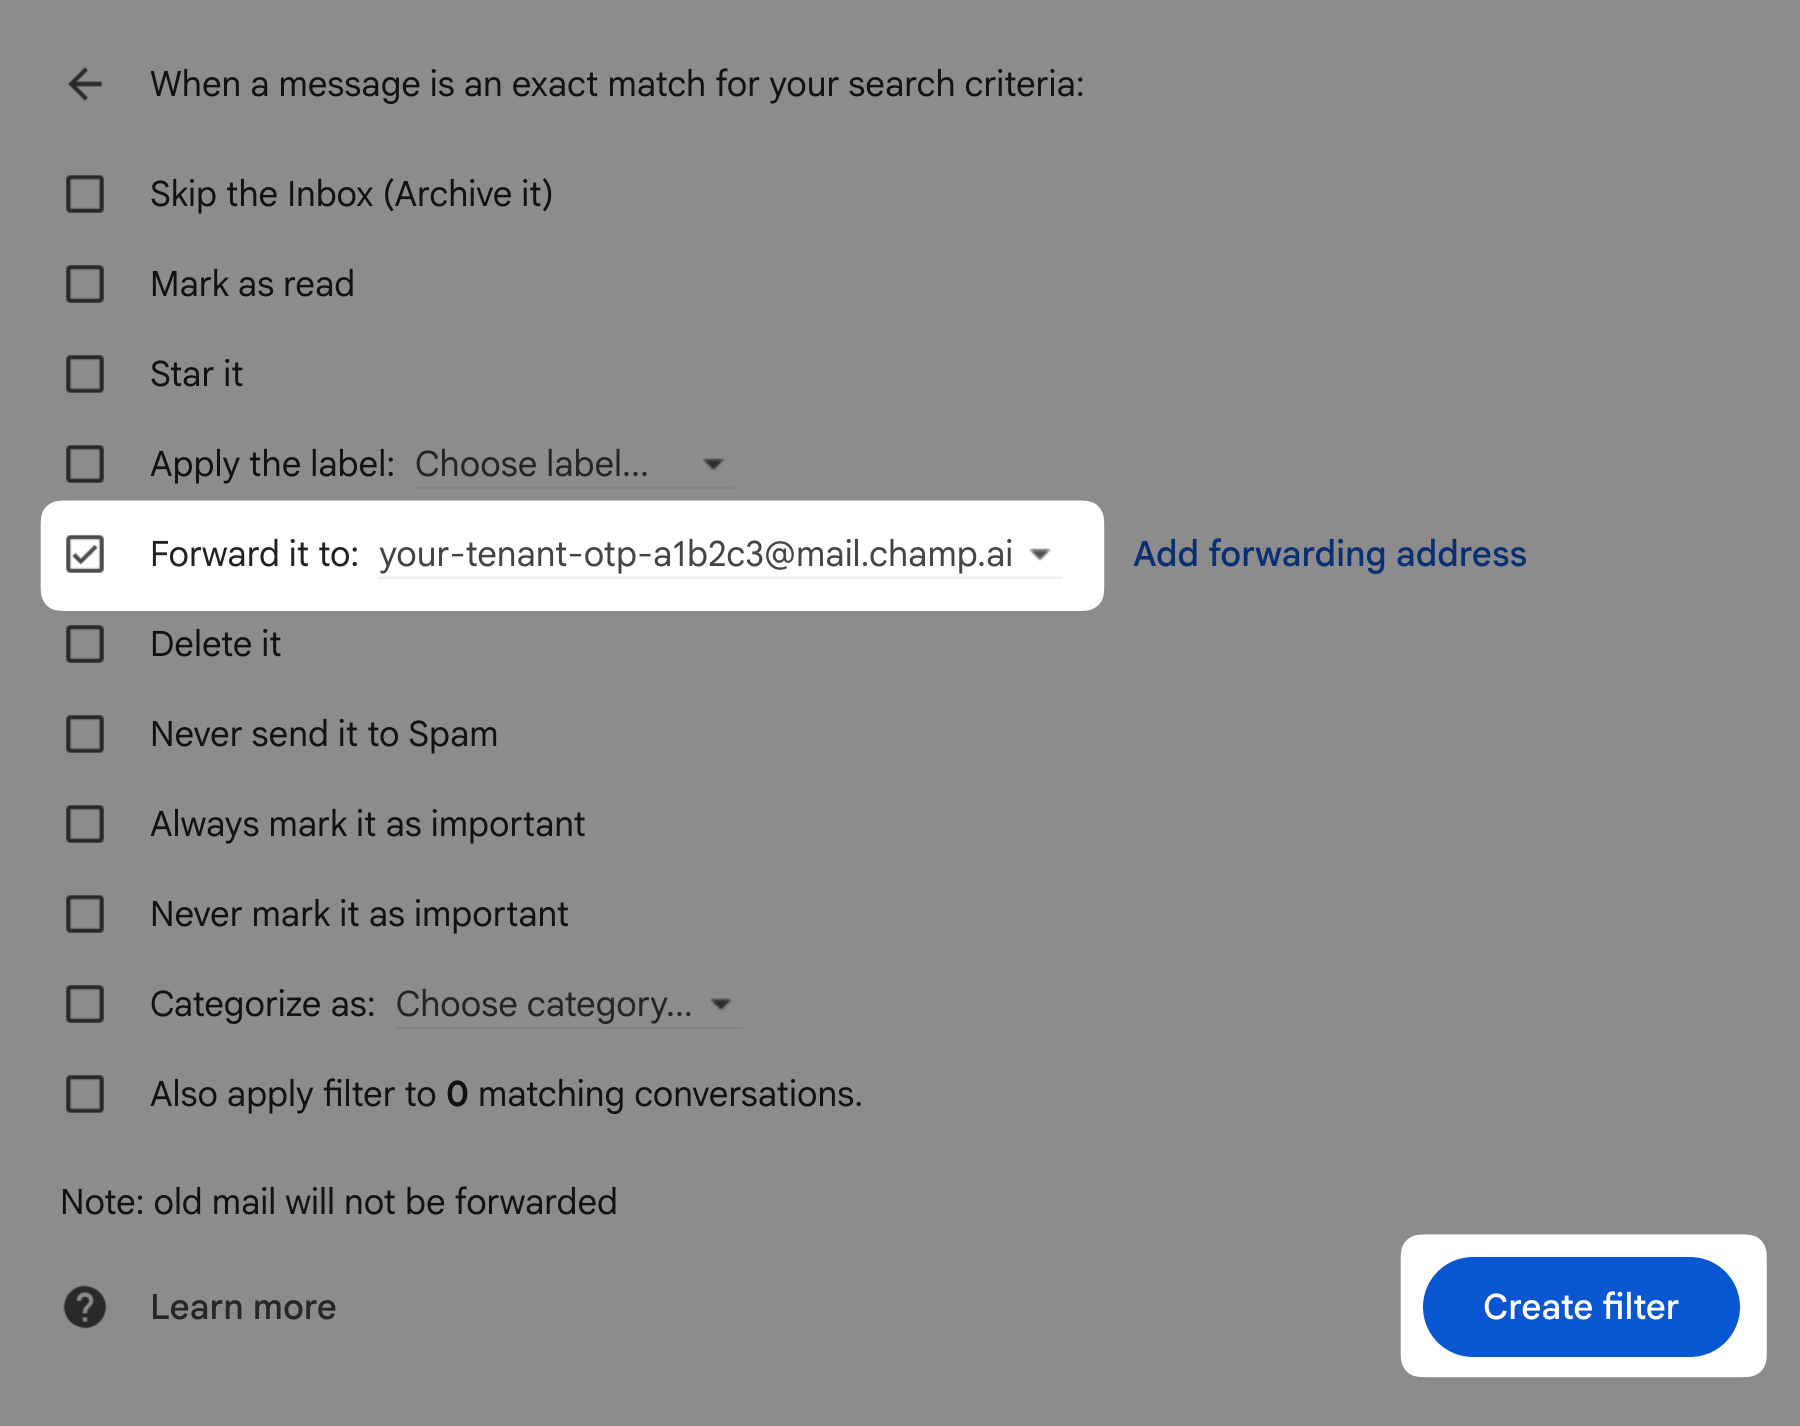
Enable Forward it to and select your Champ address.